With the onset of Halloween, children and adults all over the world fall into the magical mood of this mysterious holiday. However, besides the costumes and candy, there is another important aspect of Halloween that makes this holiday special: children’s crafts. This is the time when children can give free rein to their imagination and create amazing products that will decorate their homes and bring joy to the whole family. We at Joy-pup will dive into the world of creativity and look at a variety of ideas for children’s Halloween crafts.
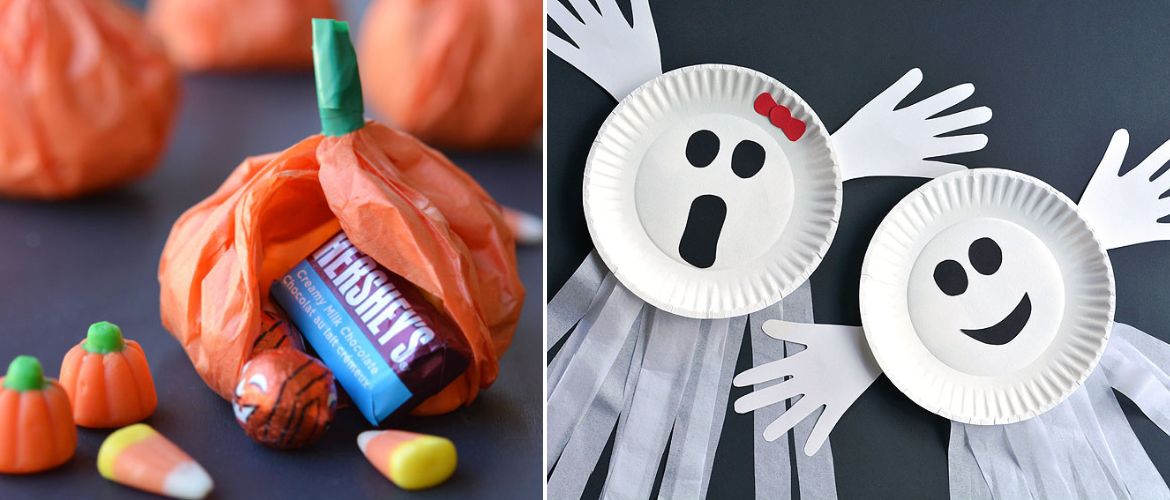
Pumpkins with candy inside
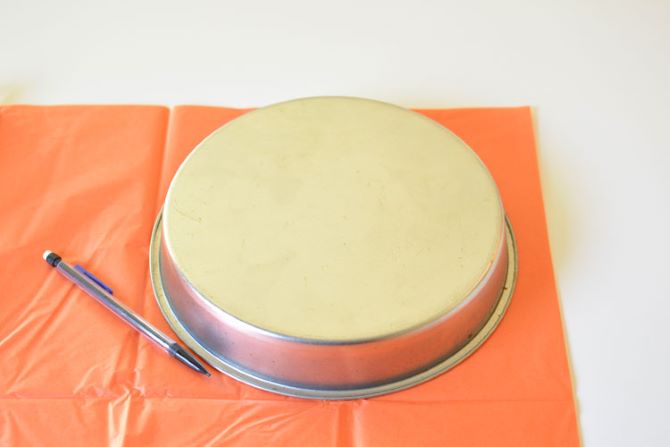
You will need
- Orange tissue paper
- Green ribbon
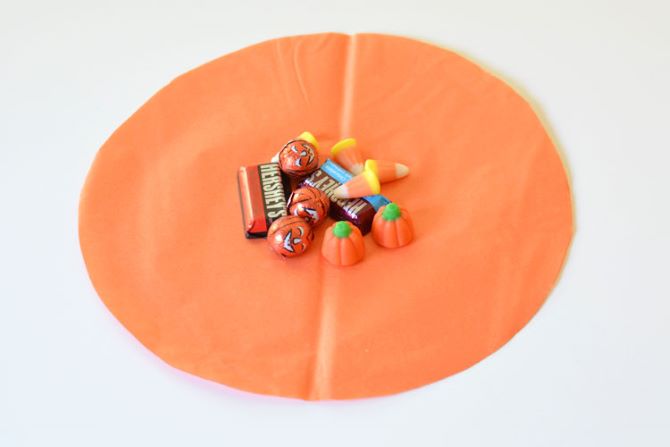
- Candies
- Round plate
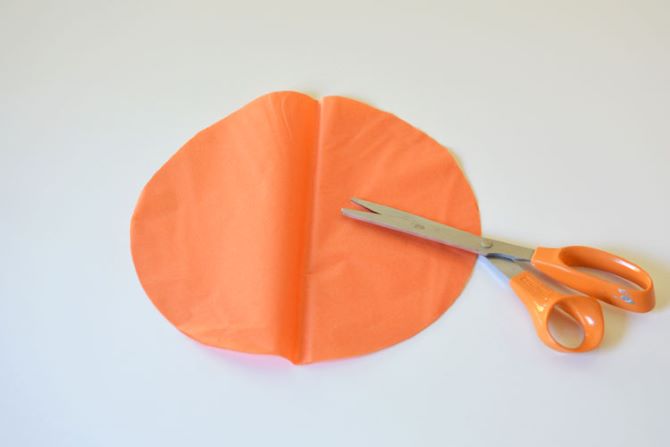
- Scissors
- Pencil
Step-by-step master class
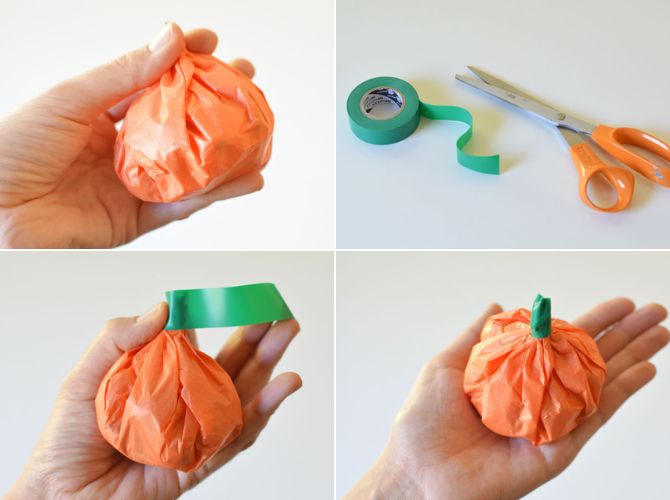
Fold 2 sheets of tissue paper together and draw the outline of a circle.
Using sharp scissors, cut out circles from tissue paper. If you want to make more than one pumpkin, stack 6-8 sheets of tissue paper together to speed up the process.
Place different candies in the center of the circle. The more candy you add, the rounder and “fuller” the pumpkin will be.
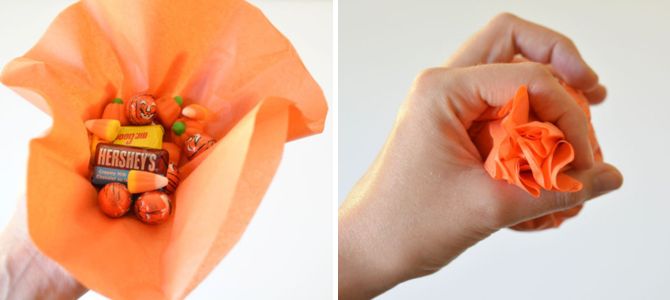
Take the circles and candies and place them in the center of your hand. Use your fingers to gently fold the paper around the candy. Try to make the folds as neat as possible. Gather the edges of the circle and then pinch and twist them tightly.
Cut a small piece of green ribbon. Wrap ribbon around the twisted end of the top of the pumpkin and twist it to form a stem.
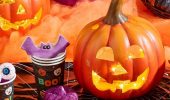
Paper plate ghosts
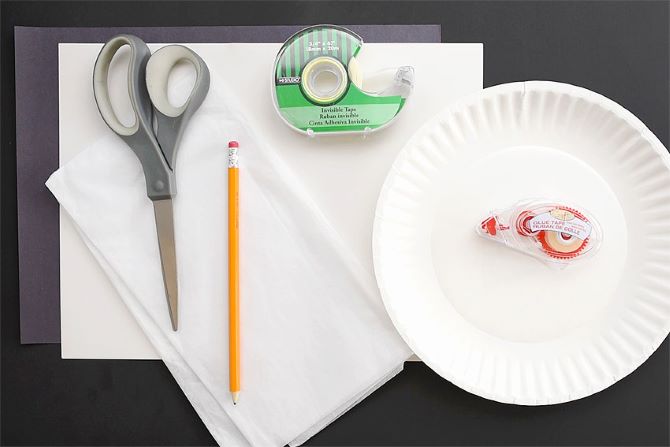
You will need
- A4 sheet of paper
- Pencil
- Scissors
- Black cardboard
- Scotch
- Glue
- Paper plates
- White napkins
Step-by-step master class
Prepare the necessary materials.
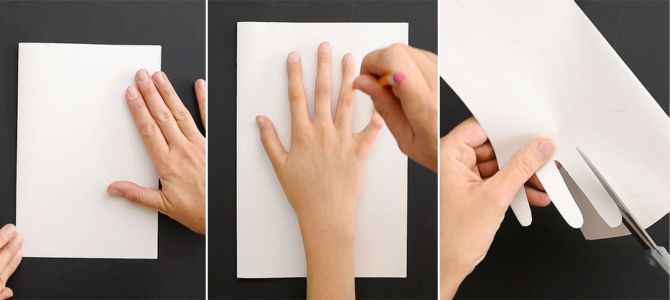
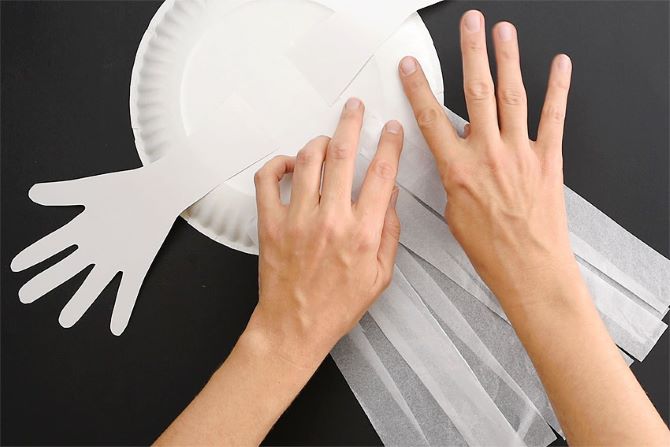
Fold a piece of A4 paper in half and use a pencil to outline your child’s palm and wrists. Cut out your handprint through both layers of paper.
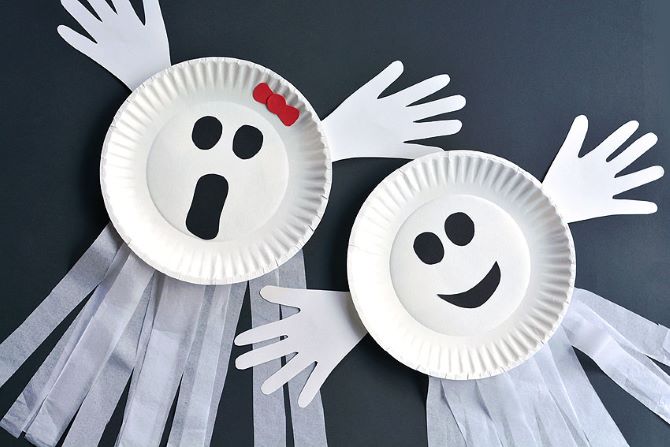
Draw with a pencil and cut out round eyes from black cardstock. Glue them to the center of the paper plate. You can skip this step and just draw the eyes and mouth of the ghosts with markers.
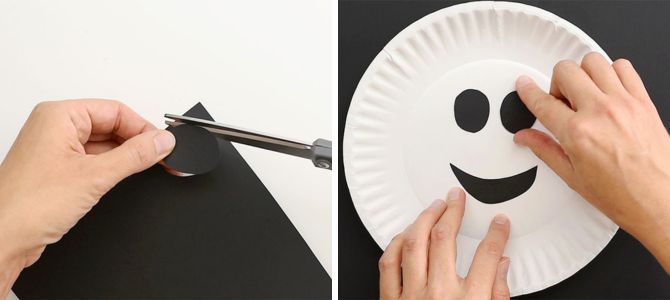
Turn the paper plate over and tape your paper palms to the back with your thumbs facing up. Tape the wrist of your palm to the paper plate to keep it from wobbling too much.

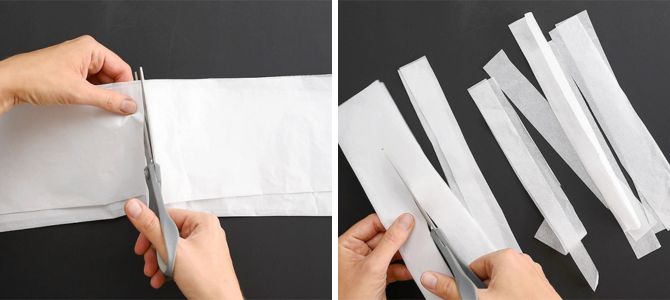
Cut the white napkin into strips about 2 cm wide.
Tape the strips to the back of the paper plate.
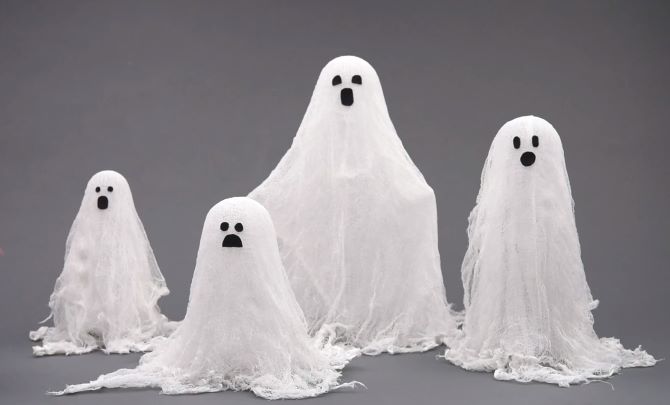
The cute ghost is ready.

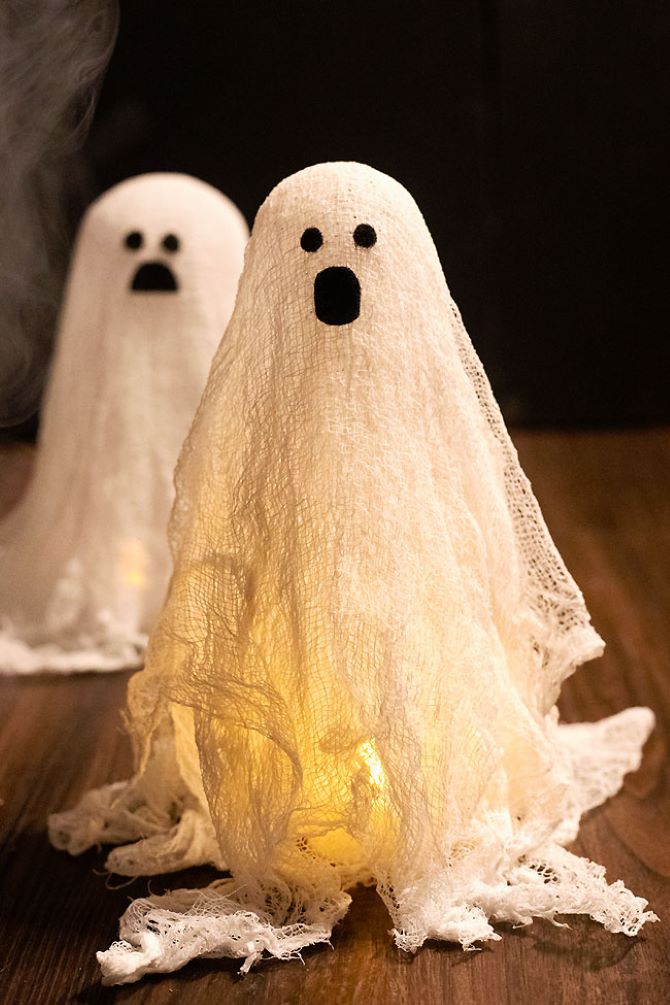
Ghost made of gauze
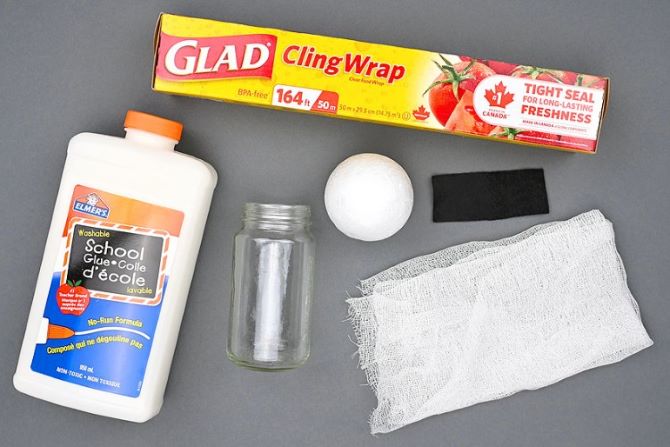
You will need
- Gauze
- PVA glue
- Water
- Glass jar
- Styrofoam ball
- Plastic container
- Polyethylene film
- Parchment
- Ice cream stick or spoon for stirring
Prepare everything you need and materials.
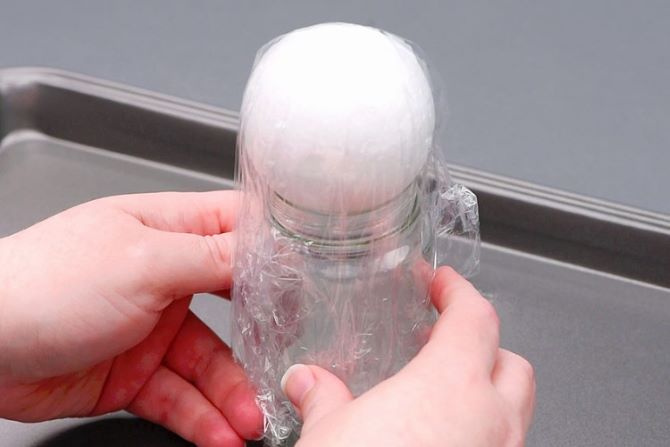
Place the empty jar on a piece of parchment paper. Place a Styrofoam ball into the mouth of the jar. Cover the ball with plastic wrap to protect it from glue.
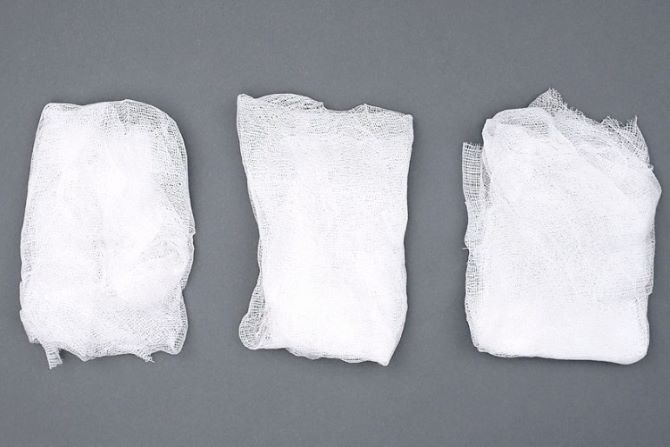
Cut three pieces of cheesecloth large enough to cover the mold (jar and ball) and place them on the tray below.
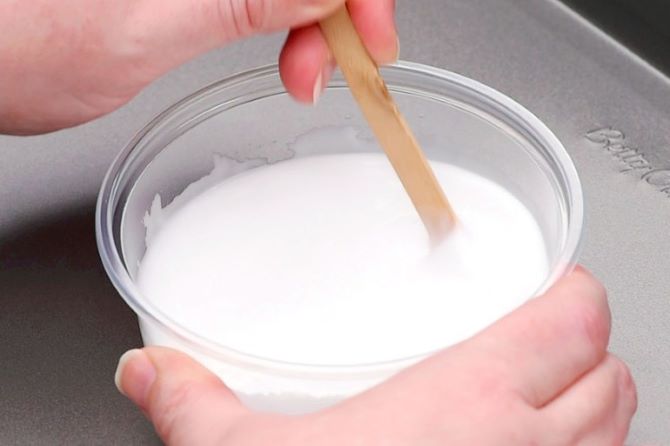
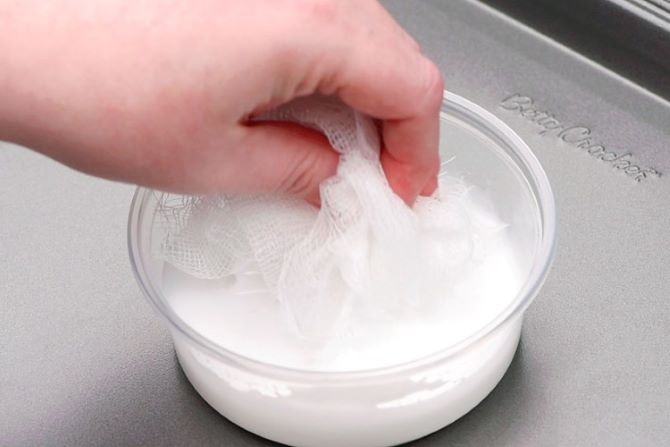
Add a little glue (about 1/3 cup) to a plastic container or bowl. Then pour in a little water, just enough to dilute the glue. Stir until smooth; the solution should be thin enough for the gauze to easily soak through.
Wrinkle one of the pieces of gauze and dip it into the glue mixture. Do not submerge the gauze completely in water, otherwise there will be too much glue left on it. Knead the gauze in your hand until the entire piece is covered with glue.
Unfold the damp gauze and place the center of the piece on top of the foam ball.
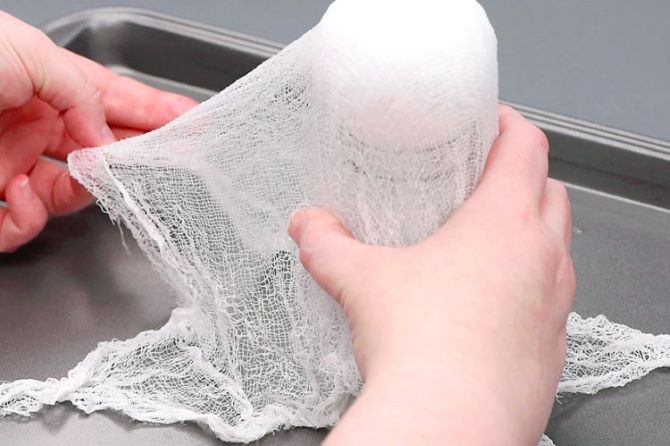
Unfold the edges of the fabric and make sure some parts of it lie flat on the tray. This will help the ghost stand up straight when it dries.
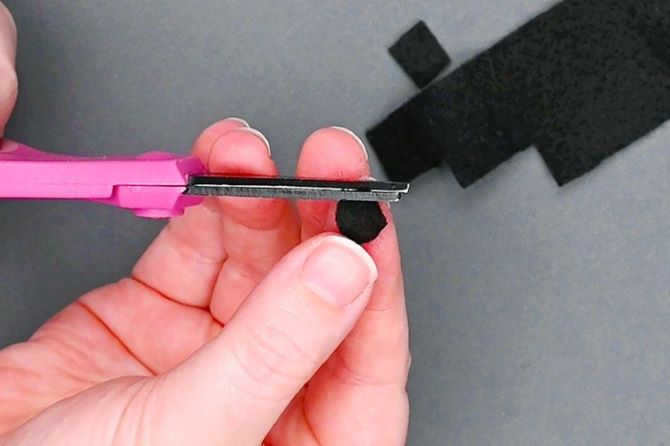
Cut out 2 eyes and a mouth from black felt and glue to the ghost.
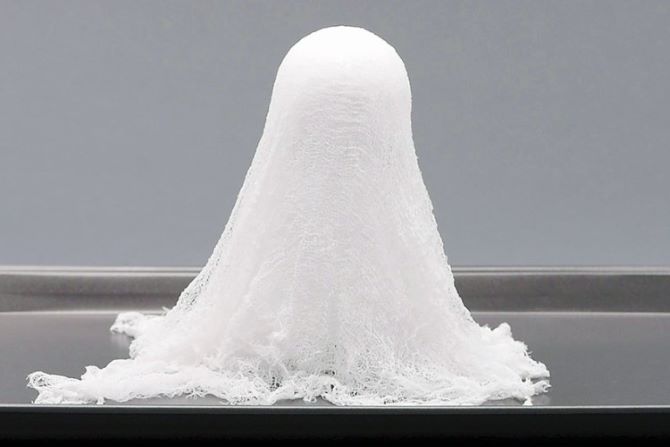
The funny ghost is ready!

Only registered users can leave comments