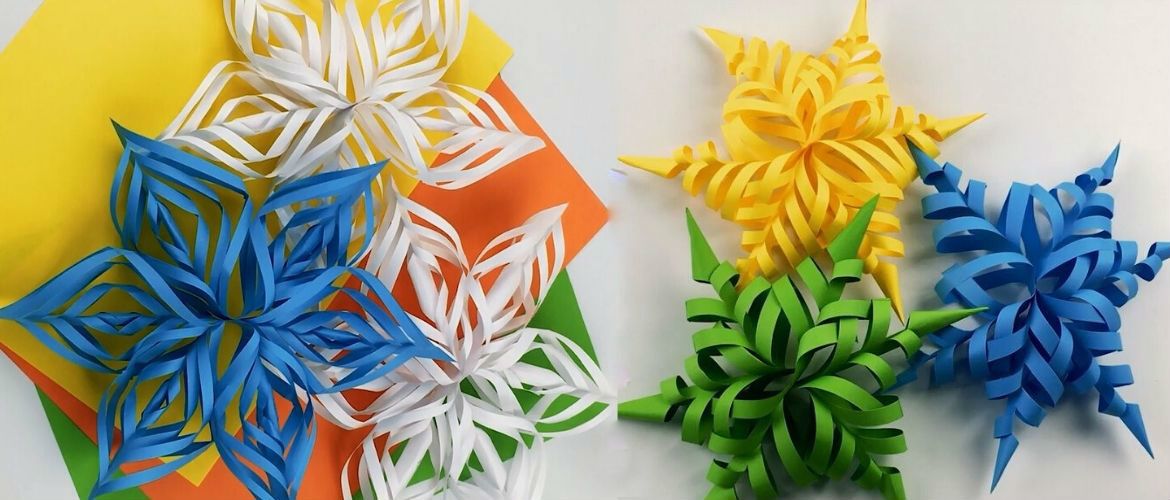
Do you want to decorate your home with unusual New Year decorations? Make chic volumetric snowflakes with your own hands. We at Joy-pup have prepared 5 simple options for creating large 3D snowflakes for you. Catch cool life hacks, watch photos, videos and create a magical New Year’s decor with us!
Life hack number 1. Snowflakes-flowers
These voluminous snowflakes can be hung on a Christmas tree instead of New Year’s toys, and can also be used to decorate windows, walls, a chandelier, ceiling, etc. For such a snowflake with your own hands, as well as for other crafts from this collection, you will need: several sheets of A4 paper, glue stick, scissors, a ruler, a simple pencil, threads.
Advice! You can take colored paper, then your snowflakes will be bright and colorful.
Step-by-step instruction
Fold a piece of paper in half lengthwise.
And then repeat folding twice more.
Now fold the sheet across in the middle and fold it in half. Cut off the ends with scissors – on all four sides.
Take a thread and wind it several times over the center of the workpiece.
Make cuts, separating the “blades” of the snowflake, as in the photo.
Glue the ends of the craft to the center one by one and make 2 cuts on each side.
Separate the “petals” of the snowflake one at a time and connect the notched ends of each petal together.
Move in a circle, gradually creating a volumetric snowflake with your own hands.
You will get such a New Year’s paper craft!
Life hack number 2. Volumetric Christmas star
To make this voluminous snowflake for the New Year, take 2 sheets of A4 paper. Study a detailed master class on how to create incredible beauty in stages.
Fold the first sheet of paper in half, and then fold one corner as shown.
Flip to the opposite side and fold the second corner.
Fold the second sheet in half, fold one corner and cut with scissors.
Then cut the same corners from the first sheet of paper.
Unfold each corner and cut in half to make 6 squares.
Fold all the squares in a stack, fold in half and make cuts as shown in the photo. Note that the notch length is reduced proportionally.
Expand the parts and begin to gradually glue the cut ends together.
Glue the ends on each piece.
You have 6 elements that should be connected together with glue in the form of a star.
Life hack number 3. Snowflake-chamomile
It will take you very little time and two sheets of paper to make this simple volumetric snowflake.
Step-by-step instruction
We start with the simplest thing – fold the first A4 sheet across – 3 times. You should have an accordion.
The next step is to fold the second sheet of paper like this three times.
Fold one of the pieces in half and cut both corners from the fold side.
Unfold and wrap with thread.
Make cuts in a semicircle on one side of the part. And on the other side, transfer the drawing with a pencil and cut it out symmetrically.
Repeat the same with the second part.
Glue both parts together and, having well smeared the ends with glue on all sides, straighten the voluminous snowflake.
Here’s the luxurious decor you can create at home with your own hands.
Life hack number 4. DIY volumetric snowflake ball
And this craft can be hung on a Christmas tree as a homemade Christmas toy. You will need 6 sheets of paper, along with a ruler, pencil, and glue. See the photo for a diagram of the step-by-step creation of a snowflake with your own hands.
Step-by-step instruction
Fold a piece of paper in half. And then using a pencil and a ruler, measure one centimeter from the middle – above and below the sheet.
Fold the ends of the paper to the marked points.
Fold over the ends of the sheet and glue.
Turn over. Measure with a ruler one centimeter on each side – above and below the leaflet.
Bend the ends along the marked points, and then “hide” them in the middle.
Coat the sheet with glue and fold it in half across.
Now fold the sheet in half lengthwise, draw the teeth with a pencil and cut along the line.
Cut 5 more of the same parts out of paper and glue them together.
Spread glue on all sides of the figure and straighten the snowflake.
Life hack number 5. Super-volume paper snowflakes
This snowflake is often used to decorate a room for the New Year. You can create delightful decor quickly and easily with your own hands.
Step-by-step instruction
Cut 6 identical squares from the sheet. Fold the first square in a triangle, as in the photo.
Make cuts on the right side of the triangle.
Expand the part and do the same with all the squares.
Glue the ends of the cuts together in stages.
Connect all 6 parts together, fixing well with glue in the center.
Your beautiful volumetric paper snowflakes are ready! Make several pieces of different colors and decorate your room brightly in New Year’s way.
And here is another video of how a little girl makes a voluminous snowflake. A great option for your kids.
Instead of paper, you can use foamiran – this will make your miniatures even more voluminous.






Only registered users can leave comments