

Chenille wire is a soft wire coated with colored flock. It is ideal for creating a variety of crafts due to its flexibility and colorful appearance. Check out Joy-pup for popular chenille wire craft ideas that kids can make.
Bonus Video Rose of Chenille Stems
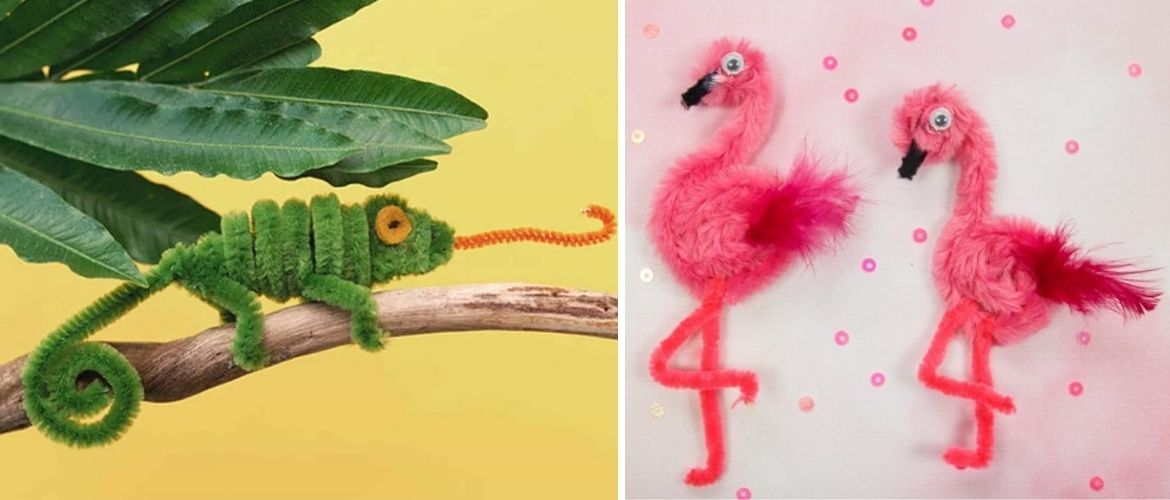
Chameleon
Materials:
- chenille wire – green and orange;
- black marker;
- orange felt;
- pencil;
- glue;
- scissors.
Manufacturing technique step by step
- For the head, wind a few turns of green chenille wire around the middle of the pencil. The size and shape of the pencil determines the size and shape of the head. Make a narrow muzzle from the neck to the nose.
- For the body, wind the green wire around the marker (the thicker the marker, the fatter the animal) and remove it.
- Make the tail very long, wrap the end.
- Cut 4 parts 4-5 cm long, attach to the body – these will be the legs.
- Bend your legs in the middle.
- Cut off the orange wire and insert it in place of the tongue, bend the end a little.
- Cut out eyes from felt and glue.
- Draw pupils with a permanent marker.
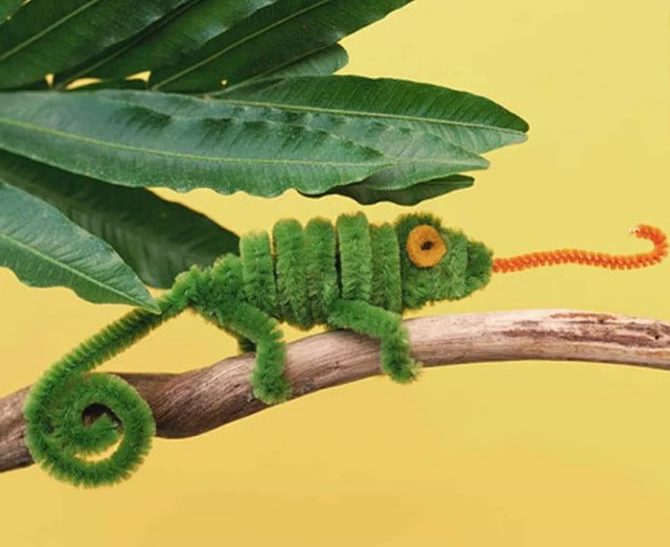
Flamingo
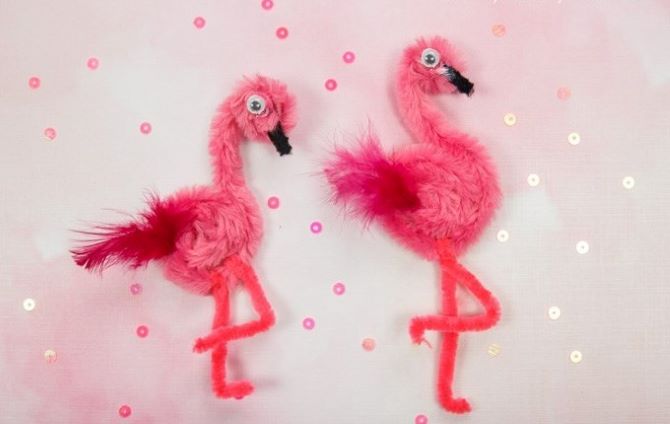
Materials:
- chenille wire black and two shades of pink;
- pink feathers;
- plastic eyes;
- glue;
- scissors.
Manufacturing technique step by step
- Start twisting the pink chenille wire from one end in a spiral until there is very little left at the other end.
- Twist the other end of the wire in an S-shape, turning the end inward into a small loop. Then fasten a small piece of black chenille wire in this loop – a beak.
- Take a darker shade of pink (or orange) wire and fold it in half. Pass it through the outer circle of the flamingo’s lower body. Cut off the excess from the legs and fold them to make the feet.
- Use some glue to attach the pink feather to the center of the torso spiral.
- Glue on the eyes and your flamingo is ready.
Spider on a lollipop
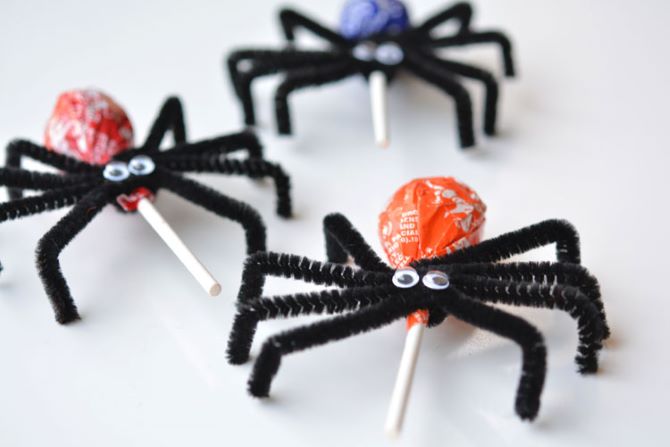
Materials:
- black chenille wire;
- plastic eyes;
- lollipop;
- scissors;
- glue gun.
Manufacturing technique step by step
- Take two chenille wires and cut them in half.
- Align the four pieces next to each other and center them so they are the same length.
- Place the lollipop on top of the wires in the center.
- Bend the chenille wires, wrap around the lollipop stick and make a loop.
- Bend the legs of the spider at an angle of 90 degrees, the distance between the legs should be the same.
- Apply a small drop of glue to the back of your eyes.
- Glue the eyes on the front of the spider’s body.
Monkey
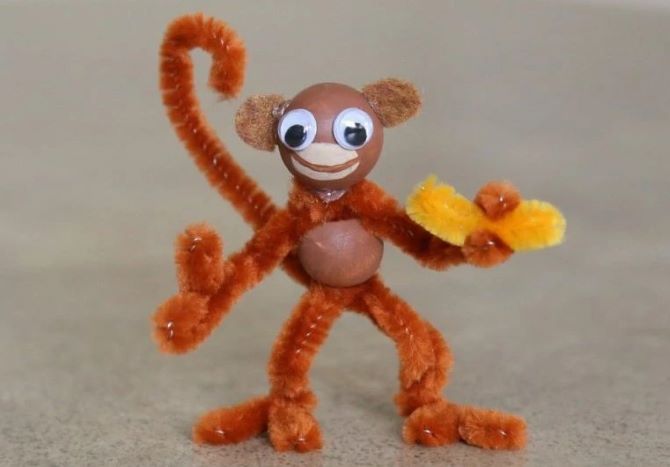
Materials:
- chenille wire brown and yellow;
- wood beads;
- brown felt;
- plastic eyes;
- glue gun;
- brown acrylic paint.
Manufacturing technique step by step
- Take 3 brown chenille wires and twist them together to form a snowflake.
- Pass the bead through three wires, fasten it in the center – this will be the torso.
- Then we form the limbs and tail. Form feet at the end of two wires.
- From the other two wires, form hands with fingers, cut off the excess.
- From the remaining wire, cut off the excess part to make a neck. Attach the bead to the end of the wire with a glue gun.
- Cut out tiny rounded ears from the felt. Glue them on the sides of the head.
- Paint the mouth of the monkey with acrylic paint.
- Cut 2-3 cm from the yellow wire – this will be a banana, which must be inserted into the paws of the monkey.

Spring compositions from natural materials...
5 February 2026

DIY New Year’s Photo Booth: TOP 8 Ideas for...
16 December 2025

New Year’s decor with dried oranges...
12 December 2025
Only registered users can leave comments